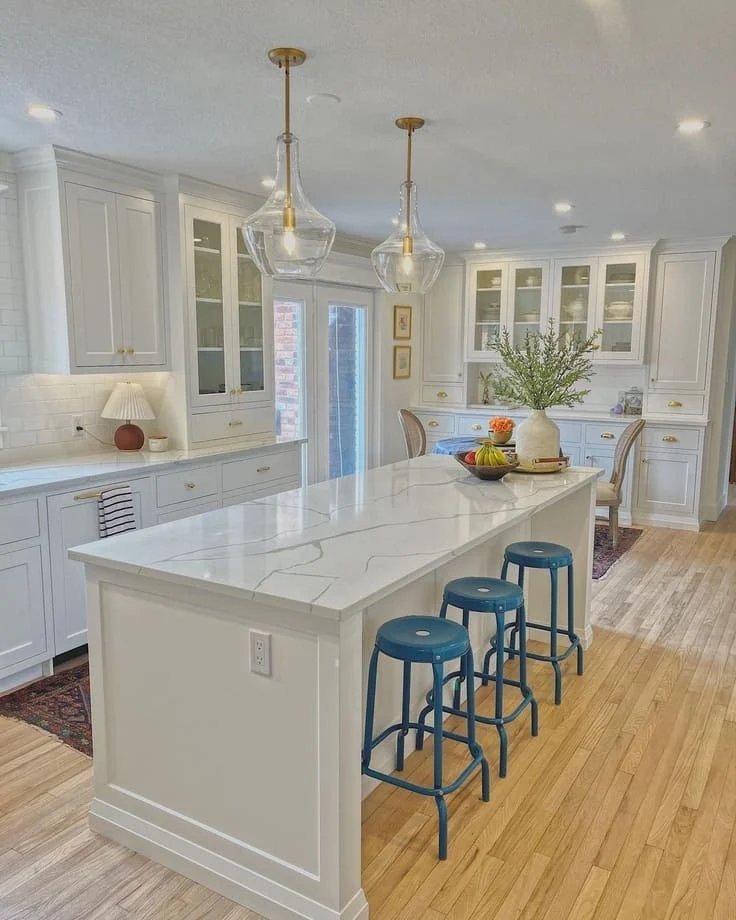
The Easiest Ways to Update Kitchen Cabinets on a Budget
The Easiest Ways to Update Kitchen Cabinets on a Budget
Kitchen cabinets set the tone for the whole room, and replacing them costs $5,000 to $15,000. But here’s what contractors won’t volunteer: most dated cabinets are structurally fine — they just look tired. A few hundred dollars and a weekend can make them look brand new.
I’ve seen $200 transformations that fooled guests into thinking the kitchen was remodeled. Here are the budget updates ranked by impact.
Paint: The Biggest Transformation for the Money
Painting cabinets is the undisputed champion of budget kitchen updates — $100 to $300 in materials for a complete transformation. The process: remove doors and hardware, clean everything with degreaser (kitchens are grimier than you think), sand lightly, prime with a bonding primer, then apply two coats of cabinet-grade enamel paint with a foam roller or sprayer for a smooth finish.
The non-negotiables: use actual cabinet paint (alkyd or urethane enamel — regular wall paint chips within months), and don’t skip the degreasing step. Tinted primer close to your finish color saves a coat. White, soft gray, and deep navy are the safest bets for resale. Budget a full weekend plus drying time — rushing the cure is how you get chips in month two. Done right, painted cabinets look professional and last 8 to 10 years.
Hardware and Small Swaps With Outsized Impact
If painting feels like too much, start with hardware. Swapping dated knobs for modern pulls costs $2 to $8 per piece — a typical kitchen needs 20 to 30 pieces, so $60 to $200 total. It takes an afternoon with a screwdriver and instantly modernizes the kitchen. Measure your existing hole spacing before buying; matching it means no drilling.
Other high-impact small moves: add under-cabinet LED strip lights ($25 to $50 — peel-and-stick, no electrician needed, and they make the kitchen feel expensive), replace a couple of solid doors with glass fronts or remove doors entirely for open shelving on one section, and add crown molding or trim to the top of wall cabinets for a custom built-in look ($30 in lumber and paint). Each of these is a half-day project. Combined, they read as a renovation.
When to Reface Instead of Replace
If the cabinet boxes are solid but the doors are truly dated (arched 90s oak, damaged laminate), refacing is the middle path: new doors, drawer fronts, and veneer on the boxes, keeping the existing layout. It costs $4,000 to $9,000 — half of full replacement — and takes 3 to 5 days with a pro.
Refacing makes sense when you like your kitchen’s layout and the boxes are in good shape. It makes zero sense if you want to change the layout, the boxes are particleboard that’s swelling, or the cost approaches 70% of new cabinets. Get quotes for both. And whatever you do, don’t put $8,000 of refacing on cabinets with failing hinges and water-damaged bases — that’s lipstick on a structural problem.
Budget Cabinet Update Priority List
Do these in order for maximum impact per dollar:
- Deep clean and declutter — free, and you’ll see the real condition.
- Swap hardware: $60-$200, one afternoon, instant modernization.
- Add under-cabinet LED lighting: $25-$50, huge ambiance upgrade.
- Paint the cabinets: $100-$300, the full transformation.
- Add trim or crown molding to wall cabinets for a custom look.
- Consider glass fronts or open shelving on one section.
- Reface ($4,000-$9,000) only if boxes are solid and layout works.
The Bottom Line
You don’t need new cabinets — you need $200, a weekend, and a plan. Paint plus new hardware transforms 90% of dated kitchens, and the smaller touches (lighting, trim, glass fronts) stack on top for a genuinely high-end look.
Start with hardware this weekend. It’s cheap, fast, and reversible. If you love the difference, you’ll have the confidence to tackle the paint job next.
What Not to Do: Cabinet Update Mistakes
The most expensive cabinet mistake is painting without degreasing. Kitchen cabinets accumulate an invisible film of cooking grease that paint absolutely will not bond to — skip the TSP-substitute scrub and your beautiful paint job peels in sheets within months. I’ve seen it happen to careful people who did everything else right. Degrease twice; when you think it’s clean, do it once more.
Second mistake: using wall paint on cabinets. It feels like a money-saver and it’s a disaster — wall paint stays soft, chips on contact, and shows every fingerprint. Cabinet-grade enamel (alkyd or urethane) cures rock-hard; it’s non-negotiable and only costs $10-$15 more per gallon. Third: rushing the cure. Paint feels dry in hours but takes 2-4 weeks to harden fully. Reinstalling doors roughly or scrubbing in week one causes chips you’ll blame on the paint.
Fourth: ignoring the hinges. Old, worn hinges make new-looking doors hang crooked and close badly — replace them ($2-$4 each for soft-close upgrades, the single best $40 you’ll spend on a kitchen). And finally: choosing trendy over timeless for a full paint job. That emerald green looks stunning on Instagram; will you love it in 2028? Navy, white, warm gray, and black age gracefully. Save the bold color for the island or a single accent section.
Quick Answers
Can I paint laminate cabinets?
Yes, with bonding primer — it’s essential on slick laminate. Sand lightly, prime with shellac-based or urethane bonding primer, then enamel topcoats.
How long do painted cabinets last?
8-10 years with proper prep and cabinet-grade enamel. Rushed jobs with wall paint can fail within a year.
Should I spray or brush cabinets?
Spraying gives the smoothest factory finish; brushing works fine with quality enamel and a foam roller for flat areas. Spraying is faster for many doors.
Let’s talk about the sprayer question, because it changes the cabinet painting experience entirely. An HVLP sprayer ($100-$200 to buy, $40-$60/day to rent) lays down a glass-smooth finish that brushing can’t match — no brush marks, no roller texture, just flawless enamel. The trade-off is masking: everything not being painted must be covered, and overspray goes everywhere. For a full kitchen of doors, spraying is absolutely worth it — do the doors in a garage or backyard spray booth, brush/roll the cabinet boxes in place. The hybrid approach gives 90% of the sprayed look with half the masking hassle.
If you spray, the technique basics: thin the paint per manufacturer specs (usually 10-15% for HVLP), maintain 6-8 inches distance, keep the gun moving in overlapping passes, and apply multiple thin coats rather than one heavy one. Practice on cardboard first — 15 minutes of practice prevents a ruined door. And wear a proper respirator (not a dust mask) — atomized paint is serious respiratory protection territory. Ventilate the spray area well. The learning curve is real but short, and the finish quality jump is the difference between ‘nice DIY’ and ‘did you hire someone?’
Further reading: This Old House cabinet painting guide, the EPA on low-VOC paint choices.
Pingback: How to Patch Drywall Holes: Any Size (2026)