The Best Way to Seal Gaps Around Windows for Winter
The Best Way to Seal Gaps Around Windows for Winter
Drafty windows can account for 25% to 30% of your heating bill — you’re literally paying to heat the outdoors. The fix is one of the cheapest, highest-ROI projects in homeownership: sealing the gaps around your windows before winter hits. Most homes need $30 to $100 in materials and an afternoon.
Here’s what to seal, with what, and in what order.
Find the Leaks First
Don’t guess — test. On a windy day, hold a lit incense stick or a thin piece of toilet paper near window edges, frames, and where the trim meets the wall. Flickering smoke or fluttering paper marks the leak. Check all four sides of every window, plus the joint where the window meets the sill. You’ll be surprised how many leaks are in the trim-wall joint, not the window itself.
Also check whether the draft is air leakage (fixable with sealing) or just cold glass (a conduction problem — sealing won’t fix single-pane coldness, though interior storm windows or insulation film help). Press your hand near the glass versus near the frame edges; frame-edge cold means leaks you can seal. This five-minute test per window tells you exactly where your money and effort should go.
Seal the Exterior and Interior Gaps
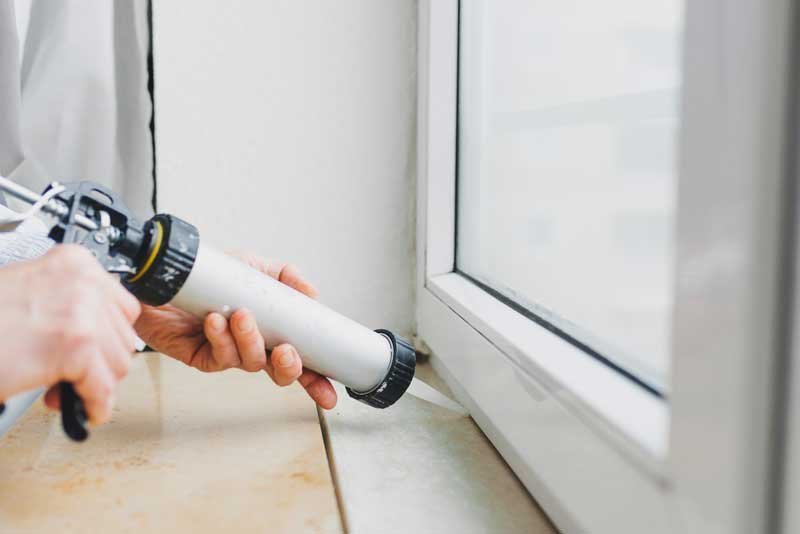
Outside: caulk the joint where the window frame meets the siding or brick — this is the primary air barrier. Use exterior-grade silicone or siliconized acrylic caulk ($6 to $9 a tube); cut the tip small, apply in a steady bead, and tool it smooth with a wet finger. Don’t caulk the weep holes at the bottom of the frame (they drain water) or seal shut any window you might need as a fire exit.
Inside: caulk where the trim meets the wall (paintable latex caulk, $4 to $6), and address the window’s moving parts with weatherstripping. Adhesive foam tape ($5 a roll) on the sash channels, V-strip tension seals ($8 for a window’s worth) in the tracks, and rope caulk ($5 — press-in, removable, perfect for renters) for odd gaps. Replace cracked or missing glazing putty on old wood windows. For the ultimate seal on rarely-opened windows, interior window insulation film kits ($5 to $8 per window) — the heat-shrunk plastic — cut drafts dramatically and are nearly invisible.
The Bigger Winter Wins
Sealing gaps is step one; these multiply the effect. Heavy thermal curtains ($30 to $60 per window) add an insulating air layer — close them at night, open on sunny days for free solar heat. Draft stoppers (door snakes, $10) at the base of leaky windows or doors. If you have old single-pane windows, interior storm window panels ($50 to $100 per window, DIY-friendly) are the single biggest upgrade short of replacement — they create the dead-air space that makes double-pane work.
Don’t forget the attic hatch and basement rim joists — they leak more air than all your windows combined in many homes. But windows are where you feel it, so start there. Total investment for an average home: $50 to $150 and a Saturday. Typical heating savings: 10% to 20%, which is $150 to $400 a winter for most households. Few projects pay back this fast.
Window Sealing Shopping List
For the average home:
- Exterior silicone caulk for frame-to-siding joints ($6-$9/tube).
- Interior paintable caulk for trim-to-wall joints ($4-$6).
- Adhesive foam tape and V-strip for sash gaps ($5-$8).
- Rope caulk for odd gaps — renter-friendly and removable ($5).
- Window insulation film kits for the worst offenders ($5-$8/window).
- Thermal curtains for bedrooms ($30-$60/window).
- Incense stick or tissue for the leak test (pennies).
The Bottom Line
The best way to seal gaps around windows for winter: find leaks with the incense test, caulk exterior frame joints and interior trim joints, weatherstrip the moving parts, and film the worst windows. $50 to $150 total, one afternoon, 10-20% heating savings.
Do it in October, not January. Your furnace — and your wallet — will notice the difference all winter.
When Sealing Isn’t Enough: Bigger Efficiency Moves
If you’ve sealed the gaps and the house still feels drafty, the problem may be insulation, not air leaks. Attic insulation is the highest-ROI energy upgrade in most homes: many older houses have 3-4 inches of ancient insulation where 12-16 inches (R-38 to R-60) is recommended. Blown-in cellulose or fiberglass ($1,500-$2,500 for most attics) pays back in 2-4 years through energy savings and transforms comfort — rooms that were always cold become normal.
Wall insulation in older homes is the bigger project: dense-pack cellulose blown into wall cavities ($2,000-$4,000) without tearing down walls. It’s messier and pricier than attic work but addresses the cold-wall radiation that sealing can’t fix — that chilly feeling standing near an exterior wall even without drafts. An energy audit ($200-$400, often subsidized by utilities) with a blower-door test quantifies exactly where your house loses energy, so you spend on the right fixes instead of guessing.
Don’t overlook the heating system itself: a furnace over 20 years old operates at 60-70% efficiency versus 95%+ for modern units. But replace equipment last, not first — sealing and insulation reduce the heating load, which means you can buy a smaller, cheaper furnace afterward. The correct order is always: seal air leaks, insulate, then right-size equipment. Skipping to the furnace first means paying for capacity you wouldn’t need in a tightened house.
Quick Answers
What’s the best ROI energy upgrade?
Air sealing first (cheapest, fastest payback), then attic insulation. Together they typically cut heating/cooling costs 15-30%.
Should I get an energy audit?
Yes — $200-$400 (often utility-subsidized) with a blower-door test shows exactly where energy escapes. It prevents spending on the wrong fixes.
Do I need new windows or just sealing?
Sealing and weatherstripping ($50-$150) capture most of the benefit. Full replacement is rarely justified on energy savings alone.
The thermostat strategy multiplies every sealing effort. A programmable or smart thermostat ($100-$250) maintaining steady temperatures beats manual cranking — the constant temperature reduces the expansion-contraction cycles that open new gaps, and setback schedules (68°F when home, 62°F sleeping/away) cut heating costs 10% annually on their own. But the placement caveat: thermostats in drafty hallways or near heat sources misread the house. If yours is badly placed, a smart thermostat with remote sensors ($50 each) averages the actual living spaces instead. Sealing stops the leaks; smart control stops the waste. Together they’re the one-two punch of winter efficiency.
Further reading: the Department of Energy on air sealing windows, Energy Star on home sealing.