What’s the Easiest Flooring to Install Yourself?
What’s the Easiest Flooring to Install Yourself?
Flooring is one of the most satisfying DIY projects — the transformation is dramatic, and the labor savings are huge. But not all flooring is equally DIY-friendly. Pick the wrong material and you’ll spend a miserable month fighting it; pick the right one and you’ll wonder why anyone pays for installation.
Here’s every realistic DIY option, ranked from easiest to hardest.
The Easiest: Peel-and-Stick and Click-Lock Vinyl
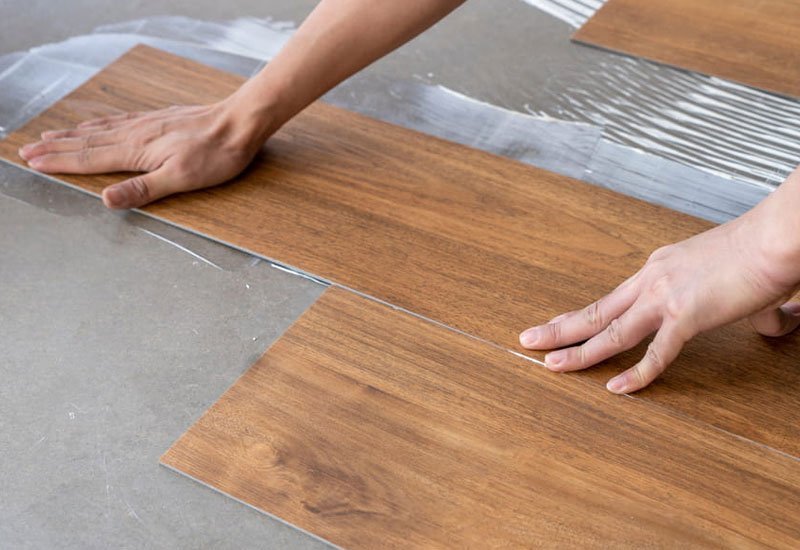
Peel-and-stick vinyl tile is the undisputed easiest flooring to install: peel the backing, stick it down, trim with a utility knife. No saws, no underlayment, no special tools — just a clean, flat floor and patience. Quality has improved enormously; the good stuff ($1.50 to $3 per square foot) looks genuinely decent. It’s ideal for laundry rooms, mudrooms, and budget makeovers. The catch: it shows subfloor imperfections and the adhesive can fail in very hot rooms.
One step up in quality and barely harder: click-lock luxury vinyl plank (LVP). The planks snap together floating over the subfloor — no glue, no nails. You need a utility knife or vinyl cutter, a tapping block, and spacers. A bedroom takes a weekend. LVP ($2 to $5 per square foot) is waterproof, tough, and looks convincingly like wood. For most DIYers, this is the sweet spot: easy enough for beginners, good enough for living rooms.
Very Doable: Laminate and Engineered Click-Lock
Click-lock laminate installs almost exactly like LVP — floating floor, tap together, cut with a saw. It’s slightly fussier (the click mechanisms are less forgiving, and you need a jigsaw or miter saw for cuts), but any patient beginner manages it. Budget a bit more time than LVP for the learning curve. Cost: $1 to $4 per square foot.
Engineered hardwood with click-lock joints is the premium DIY option ($4 to $9 per square foot) — real wood surface, same floating installation. The material demands more respect (acclimate it in the room for 48+ hours, handle carefully to avoid denting), but the install process is familiar if you’ve done laminate. The result is a real wood floor you installed yourself, which is a genuine bragging right.
What to Avoid as a Beginner
Sheet vinyl seems easy but isn’t — one wrong cut ruins a $300 sheet, and seaming is a skill. Traditional nail-down hardwood requires a flooring nailer, serious skill, and zero forgiveness; leave it to pros. Tile is the classic DIY trap: the setting looks straightforward on video, but subfloor prep, thinset mixing, leveling, and grouting have a brutal learning curve, and mistakes are permanent and expensive. A bad tile job is worse than no tile job.
Also skip anything requiring floor leveling as a first project — self-leveling compound is unforgiving and time-pressured. And whatever you choose, the unglamorous prep determines the result: the subfloor must be clean, flat (within 3/16 inch over 10 feet), and dry. An hour of prep saves ten hours of fighting wavy planks. When in doubt, start with a small room — a laundry room success builds the confidence for the living room.
DIY Flooring Ranked by Ease
Easiest first:
- Peel-and-stick vinyl tile: utility knife only, ultra-forgiving.
- Click-lock luxury vinyl plank: the DIY sweet spot, waterproof.
- Click-lock laminate: like LVP, slightly fussier clicks.
- Click-lock engineered hardwood: real wood, same floating method.
- Avoid as a beginner: sheet vinyl, nail-down hardwood, tile.
- Prep is everything: clean, flat, dry subfloor before anything.
- Start small — a laundry room before a living room.
The Bottom Line
The easiest flooring to install yourself is peel-and-stick vinyl tile, with click-lock luxury vinyl plank as the best balance of easy and good-looking. Both are weekend projects with basic tools.
Match the material to your ambition: easy wins build skills for bigger rooms. And never skip the subfloor prep — it’s the invisible half of every good flooring job.
Flooring for Specific Rooms: What Goes Where
Different rooms punish floors differently, so the ‘easiest to install’ isn’t always the ‘best for the room.’ Bathrooms and laundry rooms: waterproof is non-negotiable — LVP or tile only; laminate and engineered wood fail with standing water. Kitchens: LVP shines (waterproof, tough, comfortable underfoot); laminate works if you’re disciplined about spills. Living rooms and bedrooms: anything goes — this is where laminate and engineered click-lock show their best value and looks.
Basements need special consideration: concrete slabs transmit moisture, so whatever you install needs a moisture barrier and ideally a waterproof product. LVP directly on sealed concrete is the standard answer; laminate needs excellent moisture barriers and still risks swelling; engineered wood is risky below grade. Test your slab with the plastic-sheet method (tape a 2×2 plastic square down for 48 hours — condensation underneath means moisture issues to address first).
Stairs are the exception to DIY enthusiasm — they involve complex cuts, nosing pieces, and code requirements for tread depth. Most DIYers hire out stairs even when doing the rooms themselves ($500-$1,500 for a standard staircase). And entryways/mudrooms take the most abuse in the house: choose your toughest flooring there regardless of what flows through the rest of the home. A cohesive look matters, but durability where it counts matters more.
Quick Answers
What’s the cheapest DIY flooring?
Peel-and-stick vinyl tile at $1-$2/sq ft — minimal tools, very forgiving. Click-lock LVP at $2-$3/sq ft is the better long-term value.
Can I install flooring over existing flooring?
Often yes if it’s flat, stable, and you can handle the height change at doors. LVP and laminate both float over most existing hard floors.
How much extra flooring should I buy?
10% for simple rooms, 15% for diagonal layouts or rooms with many angles. Keep a full box for future repairs.
Acclimation is the step impatient DIYers skip and regret. Flooring materials need 48-72 hours in the installation room (not the garage — the actual room, at normal living temperature and humidity) before installation. Wood-based products expand and contract with the room’s climate; installing cold flooring from a winter garage into a heated house guarantees gaps when it warms and expands, or buckling in reverse. Stack the boxes in the room, open the ends for air circulation, and wait. It’s the most boring critical step in flooring.
Moisture testing the subfloor is the other skipped step that causes failures. For concrete slabs, tape a 2×2-foot plastic sheet down for 48 hours — condensation underneath means moisture vapor that will destroy wood-based flooring from below. For wood subfloors, a $30 pin moisture meter should read under 12% (and within 4% of the flooring’s reading). If readings are high, find the moisture source (grading, plumbing, humidity) before installing anything. Flooring installed over moisture problems fails — cupping, buckling, mold — and warranties won’t cover it. Test first, install second, enjoy for decades.
Further reading: the North American Laminate Flooring Association, This Old House flooring guides.
Pingback: Organize Your Garage on a Tight Budget (2026)
Pingback: Tankless Water Heater: Worth the Upgrade? (2026)