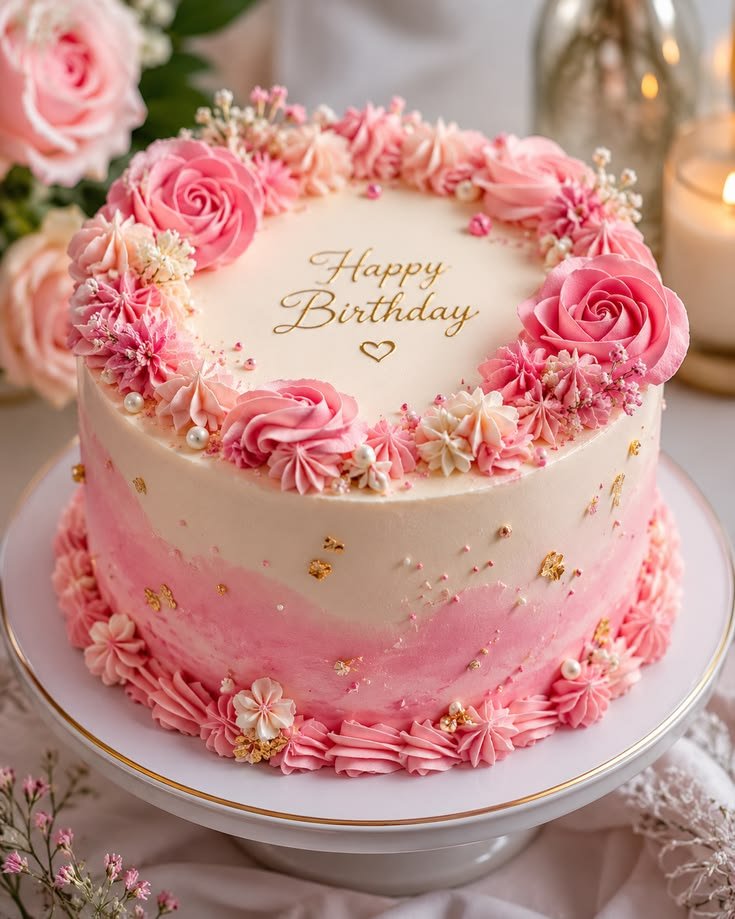
How to Make a Birthday Cake Look Professional at Home
How to Make a Birthday Cake Look Professional at Home
Want to know how to make a birthday cake look professional at home? The secret bakeries don’t advertise is that professional-looking cakes are 20% baking and 80% finishing technique. A box-mix cake with flawless frosting looks more impressive than a from-scratch masterpiece with lumpy icing. I’ve made birthday cakes for my kids for years, and the jump from “homemade-looking” to “wait, you made that?” came down to five specific techniques. None require special talent — just a little patience and about $15 in tools.
Tool Up (The $15 Kit That Changes Everything)
- Offset spatula (~$8): for smooth frosting. A butter knife can’t do this job.
- Bench scraper (~$7): for perfectly smooth sides. This is the single biggest difference-maker.
- Rotating cake stand (~$12, optional but wonderful): lets you smooth while turning instead of walking around the cake.
- Piping bags + 2-3 tips (~$8): for borders and writing.
You probably own everything else you need. These four tools are the entire difference between amateur and professional results.
Bake Flat, Level Layers
Professional cakes start with level layers. Domed tops make cakes wobble and lean. Fix it three ways: bake at 325°F instead of 350°F (slower rise = flatter top), use cake strips (wet towel strips wrapped around the pan), or simply slice the dome off with a long serrated knife once cool. Always cool layers completely — at least an hour — before frosting, or the frosting melts into a mess.
The Crumb Coat (The Step Everyone Skips)
This is the technique that separates good from great. Apply a thin, rough layer of frosting all over the cake — it doesn’t need to look nice. Its job is trapping crumbs. Refrigerate 20-30 minutes until firm. Then apply your final coat over it. The result: zero crumbs in your finish, perfectly clean frosting. Every professional bakery does this; almost no home baker does. Start, and your cakes instantly look twice as good.
Getting Smooth Sides and Sharp Edges
- Apply a generous final coat of frosting — more than you think you need.
- Hold the bench scraper vertically against the cake and rotate the stand (or walk around the cake), scraping off excess. Wipe the scraper clean between passes.
- For the top edge: drag the offset spatula from the outer edge inward, pulling the frosting lip toward the center. This creates that sharp, clean top edge you see in bakeries.
- Dip the spatula in hot water and dry it for final smoothing passes — warm metal glides over buttercream like glass.
Decorations That Look Expensive (But Aren’t)
- Fresh flowers or berries: A pile of raspberries and mint on top looks stunning and takes thirty seconds. (Use non-toxic flowers; keep stems wrapped.)
- Chocolate drip: Pour slightly cooled ganache around the top edge and let it drip naturally. Looks incredibly professional, nearly impossible to mess up.
- Simple piped border: A shell border around the base hides every imperfection where the cake meets the plate.
- Crushed cookies or nuts: Press onto the sides for texture that hides flaws and looks intentional.
- A clean cake topper: One nice topper beats ten cheap decorations.
Frosting Choice Matters
American buttercream (butter + powdered sugar) is easiest to work with and takes color well. Swiss meringue buttercream is silkier and less sweet but fussier. Cream cheese frosting is delicious but soft — chill the cake well. Whatever you choose, make sure it’s at room temperature and beaten smooth; lumpy frosting can’t be smoothed.
The Takeaway
A professional-looking birthday cake comes from level layers, a crumb coat, a bench scraper, and simple decorations — not from baking skill or expensive ingredients. And remember: room-temperature eggs matter more than fancy labels for the cake itself. Nail the finishing, keep decorations simple, and nobody will believe it came from your kitchen. And if you’re planning the party around the cake, our birthday party budget guide keeps the rest of the celebration on track. For technique videos, King Arthur Baking’s tutorials are excellent free resources.
Frequently Asked Questions
Can I make a professional-looking cake from a box mix?
Absolutely — and honestly, most guests can’t tell the difference once it’s frosted and decorated. Box mixes are engineered for consistent texture and moisture; the “homemade taste” gap is smaller than baking snobs admit. Upgrade a box mix with three tricks: use milk instead of water, melted butter instead of oil (double the amount), and add an extra egg. These swaps add richness that closes most of the gap with scratch recipes. The decorating techniques in this article matter far more than the cake’s origin.
How far in advance can I make a birthday cake?
Bake layers up to 2 days ahead — cool completely, wrap tightly in plastic wrap, and refrigerate (or freeze for up to 2 months). Frosting can be made 3-4 days ahead and refrigerated; bring to room temperature and re-whip before using. Assemble and decorate the day before the party, then refrigerate the finished cake overnight. In fact, a chilled cake is easier to slice cleanly. Just pull it out 1-2 hours before serving so the frosting softens to the right texture.
Why is my frosting too soft to work with?
Usually too much liquid or a warm kitchen. American buttercream should hold soft peaks — if it’s soupy, add powdered sugar a quarter cup at a time. If your kitchen is above 75°F, buttercream melts faster than you can spread it: chill the bowl of frosting for 15 minutes, work in a cooler room, and chill the cake between coats. Cream cheese frosting is inherently softer — if it’s unworkable, add more powdered sugar and chill the finished cake longer. In summer, Swiss meringue buttercream (made with cooked egg whites) holds up better than American buttercream.
How do I write neatly on a cake?
Practice on parchment first — always. Use a small round piping tip, hold the bag at 45 degrees, and write in cursive-style connected letters (easier than print). Common tricks: lightly trace the message with a toothpick first as a guide, keep messages short (“Happy Birthday, Emma!” not a paragraph), and pipe slowly — rushing causes wobbles. If freehand terrifies you, use letter-shaped cookie cutters pressed gently into the frosting as guides, or buy pre-made letter toppers. There’s no shame in toppers; bakeries use them too.
Pingback: 10-Year-Old Birthday Party Cost: Budget Guide