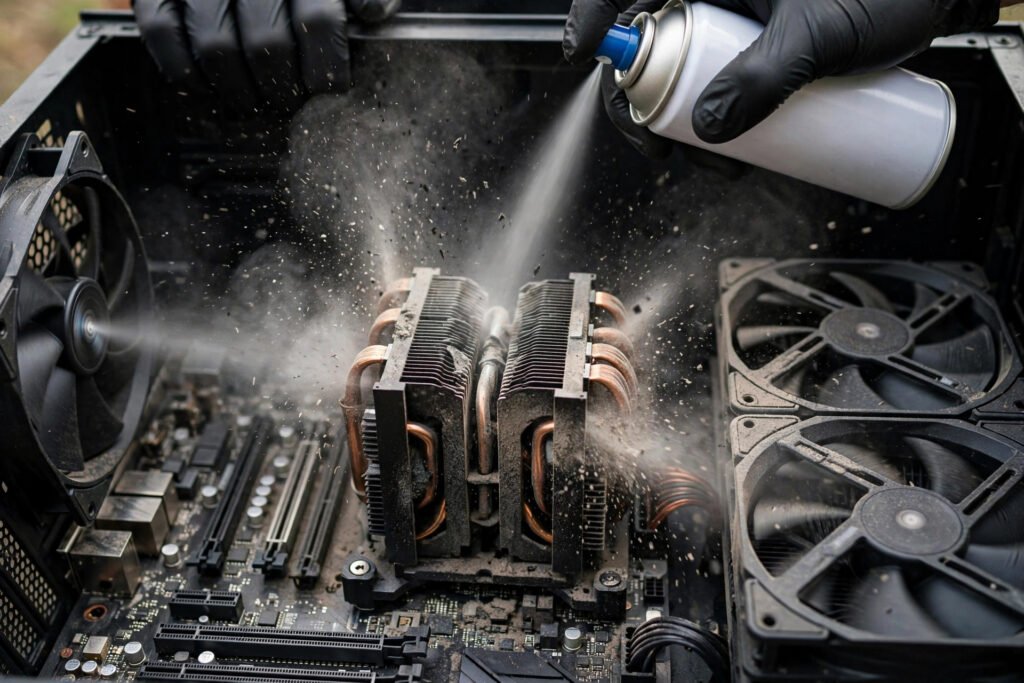
How to Clean Your Gaming PC Without Damaging Parts
Dust is the silent killer of gaming PCs. It clogs heatsinks, chokes airflow, raises temperatures by 10-20°C, and forces fans to scream — slowly degrading performance and shortening component life. Yet many gamers never clean their PCs because they are afraid of breaking something. That fear is understandable but misplaced: cleaning a PC is safe if you follow a few rules, and dangerous only if you improvise.
This guide shows you exactly how to clean your gaming PC without damaging parts — the tools you need, the step-by-step process for interior and exterior, what to never do, and a maintenance schedule that keeps temperatures low and fans quiet for years.
What You Need (and What to Avoid)
Get: a can of compressed air (or better, an electric air duster — cheaper long-term and more powerful), a soft microfiber cloth, 90%+ isopropyl alcohol, cotton swabs, and optionally a small soft-bristle brush. Total cost: under $25, or under $60 with a good electric duster that lasts years.
Never use: a vacuum cleaner inside the case (static discharge risk — the classic way beginners kill components), household cleaners or water on electronics, paper towels on screens or lenses (they scratch), or leaf blowers (absurdly powerful, static-prone, moisture-spitting). Never spin fans with compressed air freely — hold fan blades still while blowing. Free-spinning a fan with air can generate back-current that damages the motherboard fan header, and overspinning wears bearings.
Ground yourself by touching the metal case frequently, or wear an anti-static wrist strap. Work in a well-ventilated area — you will be amazed how much dust comes out of a “clean-looking” PC.
Step-by-Step Interior Cleaning
1. Power down completely. Shut down, flip the PSU switch off, unplug the power cable, then press the case power button once to discharge residual power. Wait a few minutes.
2. Move it to a good workspace. Take the PC somewhere dust can go — a garage, balcony, or bathtub (dry). Remove both side panels for full access.
3. Blow out loose dust. Starting from the top and working down, use short bursts of compressed air (hold the can upright — tilting sprays freezing propellant liquid that can damage components). Target: heatsink fins, fan blades (held still!), PSU intake grill (blow from outside in, do not open the PSU — capacitors inside can hold lethal charge), and case corners.
4. Detail the stubborn spots. Use the soft brush and cotton swabs (dampened with isopropyl alcohol) on fan hubs, between heatsink fins, and around the GPU shroud. Wipe the case interior with a dry microfiber cloth.
5. Clean the filters. Remove magnetic dust filters and wash them with water — filters are the one part where water is fine — then dry completely before reinstalling. Clean filters are the highest-impact maintenance item; clogged filters force the whole system to run hotter.
6. Check while you are in there. Look for bulging capacitors, loose cables, and fans that wobble (bearing failure). Reseat anything that looks off. This inspection catches problems early.
Deep Cleaning: Heatsinks, GPU, and Thermal Paste
Every 2-3 years (or if temperatures stay high after dusting), consider deeper maintenance. CPU cooler: remove it, clean old thermal paste from the CPU and cooler with isopropyl alcohol and a microfiber cloth, apply a pea-sized drop of fresh paste, and remount. Fresh paste alone can drop temperatures 5-10°C on an aging build.
GPU: blow dust from the shroud and heatsink fins without disassembling (disassembly voids warranties on most cards). If a card runs hot after years, repasting the GPU die is effective but advanced — watch a model-specific guide first.
Cable management: while the case is open, reroute cables for clean airflow paths. Good cable management is not vanity — it measurably improves cooling by removing airflow obstructions. Tom’s Hardware maintenance guides cover repasting technique in detail.
Exterior, Peripherals, and the Maintenance Schedule
Wipe the case exterior with a damp microfiber cloth. Clean monitor screens with a dry microfiber (never spray liquid directly on screens — spray the cloth). Keyboards: turn upside down and shake, then use compressed air between keys; removable keycaps can be washed. Mice: alcohol wipe on the shell, pick grime from the sensor area with a dry swab.
The schedule: dust filters monthly (30 seconds each), quick interior blowout every 3-6 months (10 minutes), deep clean with thermal paste every 2-3 years. Pet owners and carpet-floor PC owners: double the frequency — pet hair is the #1 dust accelerator. Elevating the PC off carpeted floors onto a desk or stand reduces intake dramatically.
Monitor temperatures with free software (HWiNFO) before and after cleaning — seeing a 15°C drop is deeply satisfying and confirms the work mattered. If temperatures stay high after thorough cleaning, suspect dried thermal paste or a failing fan, not dust. And if your machine is still struggling, revisit network performance too — sometimes “slow PC” is actually slow internet. Builders planning upgrades should also know why systems slow down after updates to distinguish software from hardware issues.
For visual learners, PC Gamer’s hardware maintenance guides include photo walkthroughs of every step above — sometimes seeing the latch on a GPU power connector once is worth a thousand words. If you have never opened your case before, take a photo of the interior before you start — it gives you a reference for cable routing and component placement when reassembling. And set a recurring calendar reminder for filter cleaning; the gamers with the coolest, quietest PCs are not the ones with the best hardware, but the ones with the most consistent maintenance habits.
Conclusion
Cleaning your gaming PC safely means: power down fully, use compressed air (never a vacuum), hold fans still, keep liquids away from electronics except isopropyl alcohol on swabs, and never open the PSU. Do filters monthly, interiors twice a year, and thermal paste every few years. Twenty minutes of maintenance buys you lower temperatures, quieter fans, and years of extra component life — the best return on effort in all of PC ownership, bar none.
Frequently Asked Questions
Can I use a vacuum to clean my PC?
No — vacuums generate static electricity that can discharge into and destroy components. Use compressed air or an electric duster designed for electronics instead.
How often should I clean my gaming PC?
Clean dust filters monthly, do a full interior blowout every 3-6 months, and replace thermal paste every 2-3 years. Pet owners should clean twice as often.
Is it safe to use compressed air on a PC?
Yes, with rules: hold the can upright, use short bursts, hold fan blades still while blowing, and keep the nozzle a few inches from components. Never spray the freezing propellant liquid directly on parts.
Should I remove the GPU to clean my PC?
Not for routine cleaning — blow dust from the shroud and fans in place. Remove it only for deep cleaning or repasting, and handle it by the edges, never touching the gold contacts.
Why is my PC still hot after cleaning?
Likely causes: dried-out thermal paste (replace it), a failing fan (check RPMs), poor case airflow (add/reposition fans), or high ambient room temperature. If cleaning did not help, the issue is mechanical, not dust.