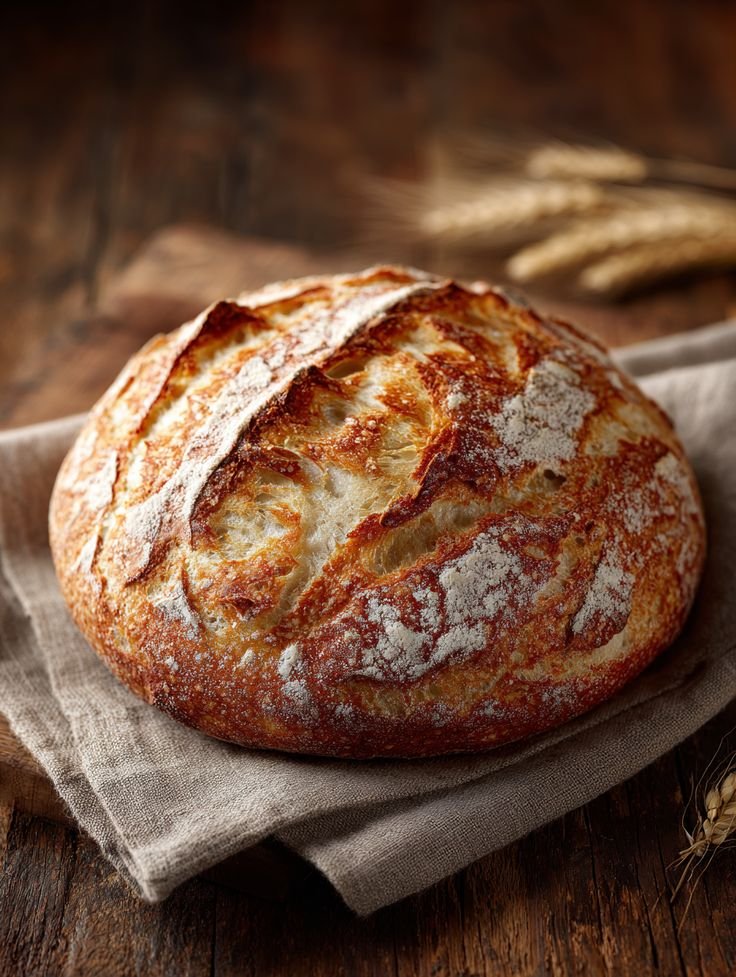
The Easiest Homemade Bread Recipe for Beginners (No Kneading, No Fuss)
The Easiest Homemade Bread Recipe for Beginners (No Kneading, No Fuss)
What’s the easiest homemade bread recipe for beginners? The famous no-knead bread: four ingredients, five minutes of active work, and a crusty, golden loaf that tastes like it came from a bakery. I was intimidated by bread baking for years — all that kneading, proofing, and mysterious “windowpane test” talk. Then I tried the no-knead method and felt silly for waiting so long. Time does the work that kneading used to do. If you can stir flour and water in a bowl, you can make this bread.
The Recipe (4 Ingredients)
- 3 cups all-purpose flour (360g)
- 1/4 teaspoon instant yeast (yes, really — that little)
- 1 1/4 teaspoons salt
- 1 1/2 cups lukewarm water
Steps
- Mix (5 minutes). Stir everything in a big bowl until no dry flour remains. The dough will look shaggy and rough — that’s correct. Cover with plastic wrap.
- Wait (12-18 hours). Leave at room temperature. The tiny amount of yeast works slowly, developing flavor and gluten without any kneading. The dough is ready when it’s bubbly, doubled, and dotted with bubbles on top.
- Shape (5 minutes). Turn the dough onto a floured surface, fold it over itself a few times, and shape into a rough ball. Let it rest 30 minutes while the oven heats.
- Bake (45 minutes). Heat the oven to 450°F with a heavy lidded pot (Dutch oven) inside. Drop the dough in, cover, bake 30 minutes; uncover and bake 15 more until deep golden brown.
- Cool (1 hour). The hardest step. Cutting too early gives gummy bread — the inside is still finishing. Wait.
Why This Works (The Science in Plain English)
Traditional bread needs kneading to develop gluten — the protein network that gives bread structure. The no-knead method trades mechanical work for time: over 12-18 hours, the yeast’s slow fermentation develops that same gluten network automatically, plus deeper flavor from the long ferment. The Dutch oven traps steam, which keeps the crust soft initially so the loaf expands fully, then crisps into that crackling bakery crust. It’s food science doing you a favor. The history of bread-making is full of slow-fermentation traditions — this method is old wisdom, not a hack.
Equipment You Need (Probably Already Own)
- A heavy lidded pot: Dutch oven is ideal; any oven-safe pot with a lid works. This is the one thing that matters.
- A big bowl for the long rise.
- Parchment paper for transferring the dough (optional but helpful).
That’s it. No stand mixer, no bread machine, no special pans.
Troubleshooting for First-Timers
- Dough didn’t rise: Your yeast was dead (check the expiration date) or the room was too cold. Buy fresh yeast; find a warmer spot.
- Flat, dense loaf: Usually under-proofed or the oven wasn’t hot enough. Make sure the pot preheats a full 30 minutes.
- Burnt bottom: Place a baking sheet on the rack below the pot to deflect direct heat.
- Sticky dough panic: No-knead dough is wet and sticky — that’s normal. Flour your hands and the surface generously; don’t add tons of flour to the dough itself.
- Pale crust: Bake longer uncovered. Deep golden-brown is the target — most beginners under-bake.
Easy Variations Once You’ve Nailed the Basic
- Rosemary sea salt: Fold in 2 tbsp chopped rosemary before the long rise.
- Cheese and jalapeño: Fold in 1 cup shredded cheddar + 1 diced jalapeño.
- Whole wheat: Swap 1 cup of flour for whole wheat (add 2 tbsp extra water).
- Everything bagel: Brush the shaped loaf with water and sprinkle everything seasoning.
The Takeaway
The easiest homemade bread for beginners is no-knead: four ingredients, five minutes of work, one long wait, and a Dutch oven. It costs under $1 per loaf and beats most store-bought bread. Once you’re comfortable, the same skills transfer to homemade pizza dough — and fresh bread with guacamole is a legitimate meal. For deeper technique, King Arthur Baking’s guides are the gold standard free resource.
Frequently Asked Questions
Can I use active dry yeast instead of instant?
Yes — use the same tiny amount (1/4 teaspoon). Active dry yeast technically benefits from dissolving in the water first, but in a 12-18 hour ferment it hydrates on its own just fine. The long timeline erases the difference between yeast types. Don’t increase the amount thinking “more yeast = faster” — the whole point is the slow ferment, which builds the flavor. More yeast just gives you blander bread, faster.
Why is my no-knead bread gummy inside?
Almost always cut too soon. The inside of the loaf keeps cooking from residual heat for a full hour after it leaves the oven — slicing early releases steam and collapses the crumb into gumminess. Wait the full hour; the bread is still warm. Other causes: under-baking (go darker than you think) or way too much water. But 90% of the time, it’s impatience. Set a timer and walk away.
Do I really need a Dutch oven?
It makes the best crust, but it’s not mandatory. Alternatives: any heavy oven-safe pot with a lid (stockpot, oven-safe saucepan), or bake on a preheated baking sheet/pizza stone with a metal bowl inverted over the loaf for the first 30 minutes (traps steam the same way). The absolute simplest: just bake it on a sheet pan uncovered — you’ll get good bread with a thinner, less crackly crust. Start with what you have; buy the Dutch oven when you’re hooked.
How long does homemade bread stay fresh?
About 2-3 days at room temperature, cut-side down on a cutting board or in a paper bag (plastic bags soften the crust). Never refrigerate bread — the fridge accelerates staling. For longer storage, slice and freeze for up to 3 months; toast slices straight from frozen. Day-old bread makes excellent toast, French toast, croutons, and breadcrumbs — stale homemade bread is an ingredient, not a failure. This is also a quiet win for reducing kitchen waste.
Can I make no-knead bread with whole wheat flour?
Yes — swap up to half the all-purpose flour for whole wheat without changing anything else, though you’ll want an extra 2-3 tablespoons of water since whole wheat absorbs more. A 100% whole wheat no-knead loaf works too, but it’s denser and heartier — add a tablespoon of honey to balance the earthiness. The long ferment actually benefits whole grain breads, softening the bran and developing deeper flavor. Start with the 50/50 blend; it’s the best of both worlds, with an open crumb and real whole-grain taste. Whatever ratio you choose, the method stays exactly the same.
Pingback: Fluffy Pancakes Without a Boxed Mix: Recipe