How to Make Your Morning Coffee Taste Like a Coffee Shop Latte
How to Make Your Morning Coffee Taste Like a Coffee Shop Latte
The $6 latte habit is $1,500+ a year — and the worst part is that a home latte can taste just as good for about 50 cents. Coffee shops don’t have magic beans; they have technique: proper espresso extraction, correctly steamed milk, and the right ratio. All learnable in a weekend.
Here’s how, whether you have an espresso machine or not.
The Espresso Base (or Close Enough)
A latte is espresso plus steamed milk — the espresso is the foundation. With an espresso machine ($150 to $500 for a decent home unit): use 18 grams of finely ground fresh coffee, extract 36 grams of liquid in 25-30 seconds. That’s a proper double shot. The details that matter: fresh beans (within a month of roast date), ground just before brewing, and water just off boil. Stale pre-ground coffee is the #1 reason home lattes taste flat.
No espresso machine? A moka pot ($30) makes strong, concentrated coffee that’s 80% of the way there — use it as the latte base and few will know the difference. An AeroPress ($40) with a fine grind and short brew makes excellent concentrated coffee too. Even strong drip coffee works in a pinch, though it’s thinner. The key in all cases: make it strong and make it fresh. Weak, stale coffee drowns in milk no matter what you do.
Steaming Milk: The Real Skill
Steamed milk — not just hot milk — is what makes a latte a latte. Properly steamed milk is glossy, velvety, with microfoam so fine it looks like wet paint. The technique with a steam wand: submerge the tip just below the surface to add air (the paper-tearing sound) for the first few seconds, then plunge deeper to heat and swirl, stopping at 140-150°F (too hot scalds the milk sweet — literally, overheated milk tastes burnt). Swirl and tap the pitcher to pop large bubbles.
No steam wand? A $15 handheld milk frother plus heated milk gets you 70% there — heat milk to 150°F, froth vigorously, tap out big bubbles. A French press works too: heat milk, pump the plunger vigorously 30 seconds. The goal in every method: glossy microfoam, not dry cappuccino foam. Whole milk steams easiest and tastes richest; oat milk is the best non-dairy steamer (Oatly Barista edition was literally designed for this).
Ratios, Assembly, and the Little Things
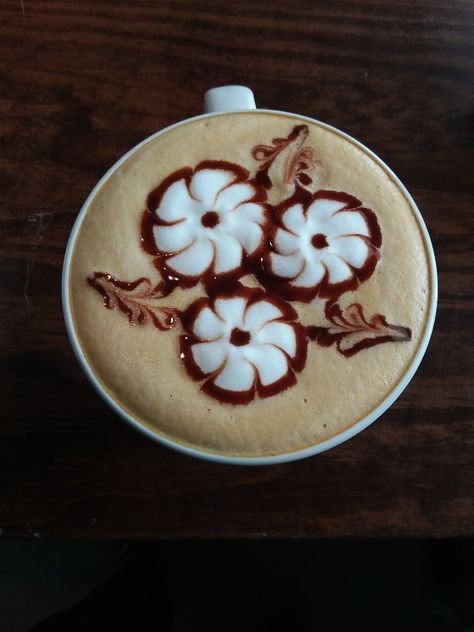
The classic latte ratio: 1 part espresso to 5-6 parts steamed milk — for a 12 oz latte, that’s a double shot plus about 10 oz of milk. Pour the milk from a height first to mix, then close to the surface for any art attempts (start with the heart — it’s just a wiggle). The milk should integrate with the espresso into a uniform tan color, not sit in layers.
The little things that close the gap: preheat your cup (hot drink in a cold cup cools fast), use filtered water (off-flavors in water become off-flavors in coffee), and dial in one variable at a time when something tastes off (sour = under-extracted, grind finer; bitter = over-extracted, grind coarser). Total startup cost for the moka-pot-plus-frother path: under $50. The espresso-machine path: $200 to $500. Either way, the machine pays for itself in 1-3 months of skipped coffee shops — and your kitchen starts smelling incredible.
Home Latte Essentials
What you need:
- Strong coffee base: espresso machine, moka pot ($30), or AeroPress ($40).
- Fresh beans, ground just before brewing — the #1 quality factor.
- Milk steaming: steam wand, $15 frother, or French press method.
- Target milk temp: 140-150°F; glossy microfoam, not dry foam.
- Ratio: double shot + ~10 oz steamed milk for 12 oz latte.
- Preheat the cup; use filtered water.
- Whole milk steams best; oat milk (barista edition) for non-dairy.
The Bottom Line
A coffee shop latte at home needs three things: strong fresh coffee, properly steamed milk (140-150°F, glossy microfoam), and the right ratio. Under $50 in gear gets you 80% of the way; an espresso machine closes the gap.
At 50 cents versus $6, the home latte pays for any setup in weeks. And honestly? Once you dial it in, you’ll prefer yours.
Troubleshooting Your Home Lattes
Sour latte? Under-extraction — the water rushed through too fast. Grind finer, ensure proper tamping pressure (30 lbs, level), and check that your dose fills the basket correctly. Sourness in espresso always means under-extracted; it’s the most common home-barista flaw and the fix is always grind finer or dose up. Bitter latte? Over-extraction — grind coarser, shorten the shot time. Bitter plus sour simultaneously usually means channeling (water finding paths of least resistance) — distribute grounds evenly and tamp level.
Milk problems have their own diagnostics: flat, bubbly foam means you added air too long or too aggressively — the paper-tearing sound should last only 2-3 seconds for lattes, then submerge to heat. Scalded taste means overheated milk (past 160°F) — use a thermometer until you can judge by touch (the pitcher becomes uncomfortably hot to hold around 140-150°F). Milk that won’t foam: check freshness (old milk foams poorly), fat content (skim is hardest; whole is easiest), and temperature (cold milk foams better — always start cold).
Equipment upkeep matters: backflush the espresso machine weekly (monthly with detergent), descale every 2-3 months (more with hard water), replace water filters on schedule, and purge the steam wand before and after every use (dried milk in the wand is disgusting and affects taste). A $200 machine maintained well outperforms a $500 machine neglected — the maintenance is the difference between café-quality and disappointment, and it takes minutes per week.
Quick Answers
Why does my latte taste sour?
Under-extracted espresso — grind finer, check your dose, and ensure even tamping. Sourness always means the water went through too fast.
What milk is best for lattes?
Whole dairy steams easiest with the richest taste. For non-dairy, barista-edition oat milk was designed for steaming and performs best.
Do I need an expensive espresso machine?
No — a $30 moka pot plus $15 frother makes excellent lattes. Espresso machines ($200+) add convenience and refinement, not magic.
The grinder investment hierarchy is worth understanding before spending. The blade grinder ($15) is actually worse than pre-ground for espresso — it produces inconsistent particle sizes that cause channeling and sour-bitter confusion. The minimum viable espresso grinder is a quality burr grinder ($150-$200 — consistent particles, the actual requirement). The grinder matters more than the espresso machine: a $200 grinder with a $150 machine outperforms a $50 grinder with a $500 machine, every time. If your lattes taste off despite good technique, the grinder is the prime suspect. It’s the least glamorous, most impactful upgrade in home coffee — the component experienced baristas upgrade first.
Further reading: the National Coffee Association, Serious Eats on coffee technique.