How to Do a Facial at Home Like a Professional (Guide)
A professional facial costs $75 to $200, takes an hour, and leaves your skin glowing for a week. The at-home version is usually a random face mask slapped on while watching TV — pleasant, but not remotely the same thing. The difference is not expensive products or esthetician magic. It is sequence: professional facials follow a specific order of operations — cleanse, exfoliate, extract, massage, mask, protect — and each step prepares the skin for the next. Follow the same sequence at home and you get remarkably close to the spa result.
Here is how to do a facial at home like a professional: the complete step-by-step ritual, what each step accomplishes, which products to use (and which to skip), and the safety rules that keep DIY facials beneficial instead of damaging.
Set the Stage
Professionals start with preparation, not products. Tie hair back fully, cleanse your hands, and work on a clean face — remove all makeup first with a dedicated remover, not the facial cleanser. Gather everything before you start: cleanser, exfoliant, warm towels, mask, moisturizer, sunscreen. A facial interrupted by product-hunting is a facial done wrong. Set aside 45 to 60 uninterrupted minutes; rushing defeats the purpose. Optional but worth it: dim lighting, calming music — the relaxation response genuinely improves the experience, and stress shows on skin.
Step 1: Double Cleanse
Estheticians always cleanse twice: first an oil-based cleanser or balm to dissolve sunscreen, makeup, and sebum; then a water-based gentle cleanser to clean the skin itself. Massage each for a full 60 seconds — the massage matters as much as the product, boosting circulation and loosening congestion. Rinse with lukewarm water (hot water irritates; cold water does not clean as effectively). This is the foundation — every subsequent step performs worse on poorly cleansed skin.
Step 2: Exfoliate
Choose chemical over physical: an AHA (glycolic or lactic acid) for dullness and texture, or BHA (salicylic acid) for congested, oily skin. Apply to dry skin, leave for the product’s recommended time (usually 5 to 10 minutes), then rinse thoroughly. Do not combine with a scrub — one exfoliation method per facial. If your skin is sensitive, reactive, or currently irritated, skip this step entirely; an at-home facial should never cause significant stinging. Over-exfoliation is the number-one way DIY facials go wrong.
Step 3: Steam
Professional steamers are lovely; a bowl of hot water with a towel over your head works nearly as well. Steam for 5 to 10 minutes — it softens sebum, opens the feeling of pores (pores do not literally open and close, but softened debris extracts far more easily), and preps for the next step. Keep your face a comfortable distance from the water; scalding steam damages capillaries. Skip steaming if you have rosacea or highly reactive skin — heat worsens both.
Step 4: Extractions (Proceed With Caution)
This is where home facials most often go wrong. The professional rule: only extract what comes easily. After steaming, wrap fingers in clean tissue and apply gentle pressure around (not on top of) visible blackheads — if it does not release with light pressure, leave it. Never extract inflamed pimples, cysts, or anything painful — you will cause scarring and spread infection. Do not use metal extractor tools without training; they bruise and scar in inexperienced hands. When in doubt, skip extractions entirely — a facial without them still delivers 90 percent of the benefit.
Step 5: Massage
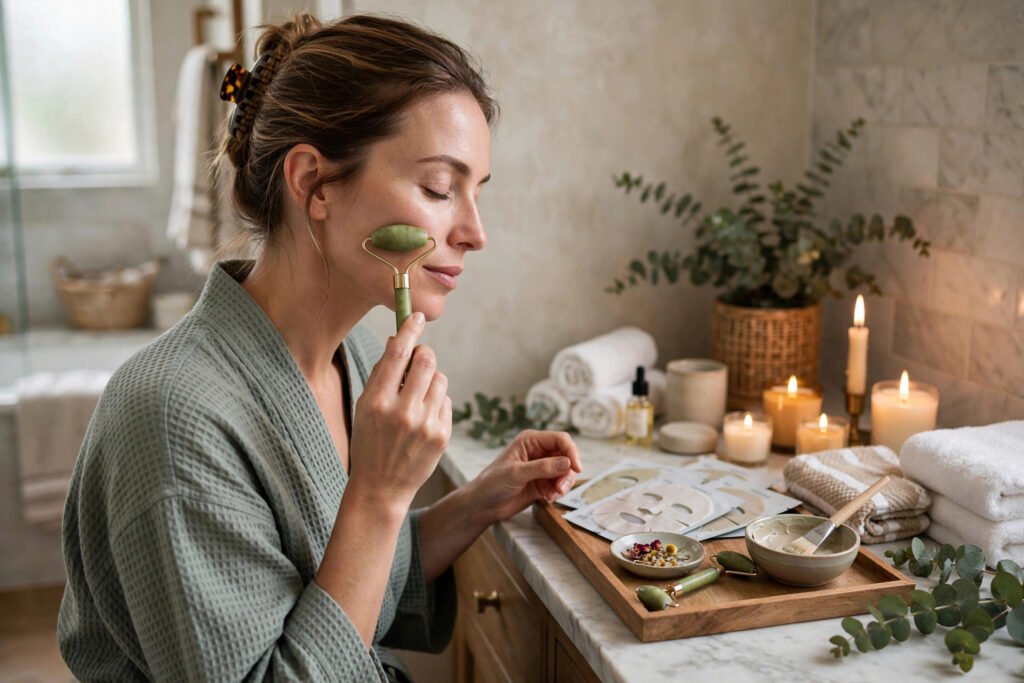
The most underrated step. Using a facial oil or your moisturizer, massage for 5 to 10 minutes: upward strokes along the jaw, circular motions on the cheeks, gentle pressure at the temples, drainage strokes down the neck. Facial massage boosts circulation (the post-facial glow is largely blood flow), relieves jaw tension, and aids lymphatic drainage that reduces puffiness. Tools like jade rollers and gua sha are pleasant but optional — your fingers do the real work. This step is pure benefit with essentially no risk, so do not skip it.
Step 6: Mask
Match the mask to your skin’s current needs, not its permanent type: clay masks for congestion and oiliness, hydrating sheet or cream masks for dryness and dullness, soothing masks with aloe or oatmeal after exfoliation. Apply evenly, avoiding the eye area, and leave for the recommended time — longer is not better, and dried-out clay masks irritate. Remove gently with a warm damp towel, not harsh rubbing.
Step 7: Protect and Seal
Finish with your regular serum and moisturizer to seal in the facial’s benefits — post-exfoliation skin absorbs products beautifully, so this is the moment your best serum earns its price. If it is daytime, sunscreen is mandatory: exfoliated skin is more sun-sensitive, and skipping SPF after a facial undoes the good work. If your skin feels reactive after exfoliation, choosing a gentle formula matters — see how to choose the right sunscreen for sensitive skin. At night, a slightly richer moisturizer than usual locks everything in.
How Often and What It Costs
A full at-home facial every one to two weeks suits most skin; weekly is fine for non-exfoliating versions (cleanse, steam, massage, hydrating mask). The product investment is modest — most people already own 80 percent of what they need, and a good chemical exfoliant plus a quality mask are the only real purchases. Compared to $150 spa facials, the DIY version pays for itself immediately, which makes it an easy line item in how much you budget for monthly self-care.
The American Academy of Dermatology supports at-home exfoliation and masking when done gently — and Cleveland Clinic dermatologists echo the key caution: stop any step that causes significant burning or prolonged redness. A facial should never hurt.
Customizing for Your Skin Concerns
The basic sequence stays the same; the products change with your goals. For acne-prone skin: use a salicylic acid exfoliant, a clay mask for the masking step, and skip heavy facial oils during massage (use a lightweight gel moisturizer instead). For dry or mature skin: choose lactic acid exfoliation, a hydrating cream mask, and richer massage mediums — this skin type benefits most from the full ritual. For sensitive skin: skip exfoliation entirely some sessions, use oatmeal or aloe masks, keep steaming brief and warm (not hot), and patch-test every new product.
For dullness and uneven tone — the most common facial goal — the exfoliation and massage steps do the heavy lifting: glycolic exfoliation plus thorough massage delivers the glow most people are after. Whatever your concern, the rule is one active focus per facial; trying to treat acne, aging, and sensitivity in a single session is how DIY facials cause the problems they were meant to solve.
Conclusion
A professional-quality facial at home follows the professional sequence: double cleanse, chemical exfoliation, steam, careful extractions (only what releases easily), facial massage, targeted mask, and serum-moisturizer-sunscreen to finish. Respect the safety rules — no aggressive extractions, no over-exfoliation, no steaming rosacea — and the results genuinely rival the spa. Your skin cannot tell whether the hands were licensed; it only knows the sequence was right.
Frequently Asked Questions
How often should I do an at-home facial?
Every one to two weeks for the full ritual including exfoliation. Gentler versions (cleanse, massage, hydrating mask) can be done weekly. More frequent exfoliating facials risk barrier damage.
Can I do extractions at home safely?
Only the easy ones: post-steam blackheads that release with gentle pressure. Never extract inflamed pimples, cysts, or anything requiring force — and skip metal tools without training. When in doubt, leave it for a professional.
What is the best mask for an at-home facial?
Match it to current needs: clay for congestion, hydrating for dryness, soothing after exfoliation. There is no universal best — the “right” mask changes with your skin’s week-to-week condition.
Should I do a facial before a big event?
Do the full facial 3 to 5 days before, not the day before — exfoliation and extractions can cause temporary redness. The day before, stick to a gentle hydrating mask only.